(日本人)
Build a Sumo Model 
In this series of assignments you will learn how to create a model using BridgePoint. We will walk though the model creation process step-by-step. These instructions assume you have already installed BridgePoint and launched it.
-
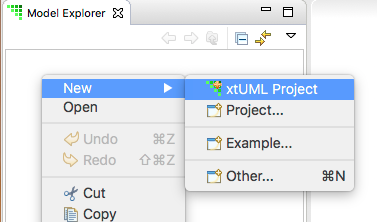
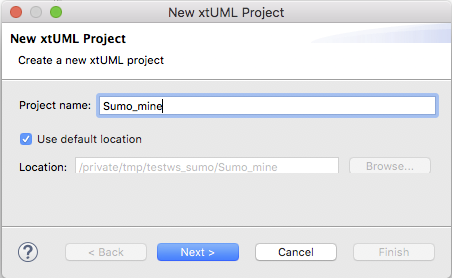
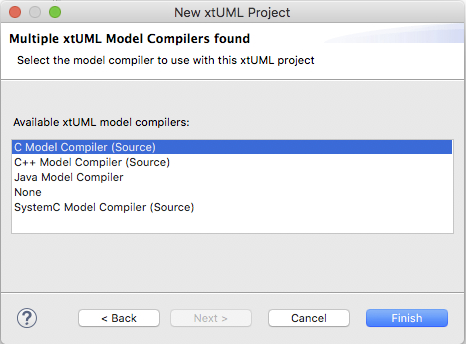
Create a new xtUML Project named Sumo_mine
-
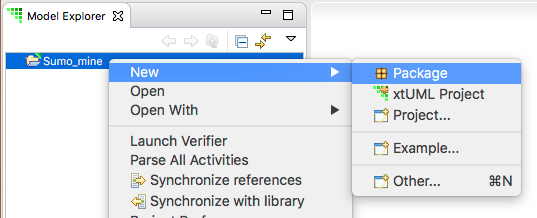
Right-click on Sumo_mine in Model Explorer view and select New > Package. Name the package IO DTs
-
Create package RobotInterface under Sumo_mine
-
Double-click package IO DTs to open it
-
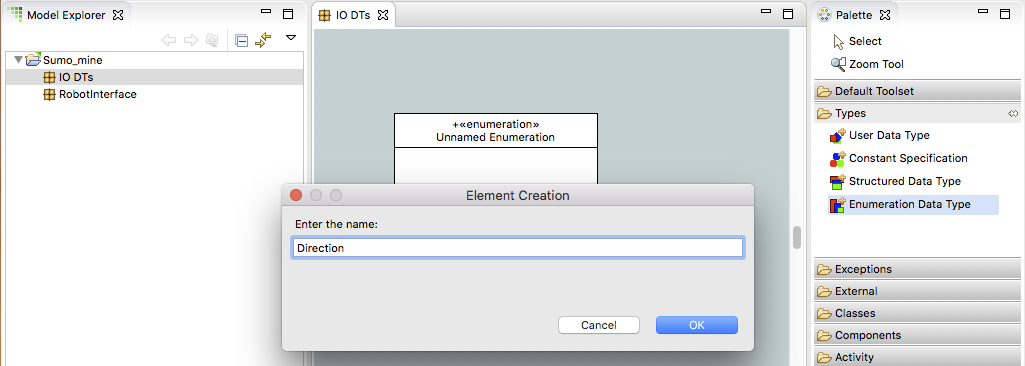
Create Enumeration Data Type Direction inside IO DTs package. Creation can be performed in any of three ways:
-
Click the name of the element (here Enumeration Data Type) in the Palette to select the tool, then click on the canvas diagram to place the element.
-
Right-click on the canvas diagram and use the context menu New > …
-
Right-click on the element in Model Explorer that you want to contain your new element and use the context menu New > …
-
-
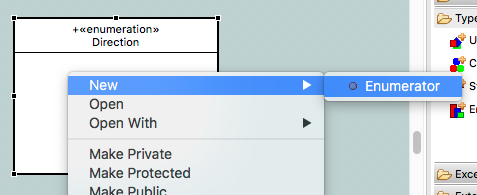
Right-click on the Direction enumeration and select New > Enumerator. Name the enumerator backward
-
Create Enumerator stop inside Direction
-
Create Enumerator forward inside Direction
-
Create Enumeration DataType Orientation inside IO DTs package
-
Create Enumerator left inside Orientation
-
Create Enumerator straight inside Orientation
-
Create Enumerator right inside Orientation
-
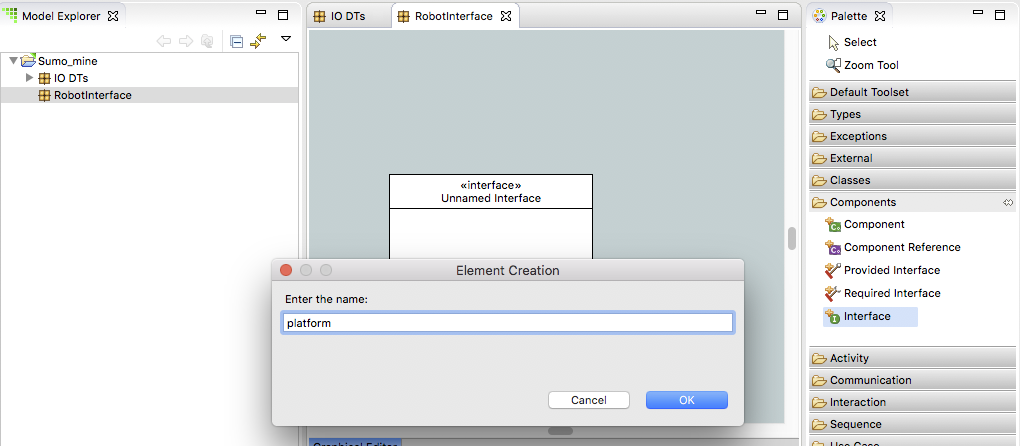
Double-click package RobotInterface in the Model Explorer view to open it
-
Create interface platform inside RobotInterface
-
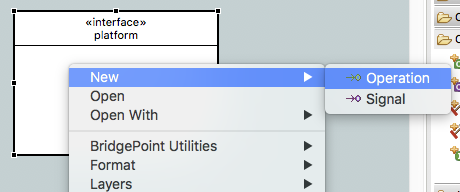
Use the right-click context menu to Add the following operations and signals to platform
-
operation: init
-
operation: lineDetected
-
operation: touchLeft
-
operation: touchRight
-
operation: untouchLeft
-
operation: untouchRight
-
signal: go
-
signal: turn
-
signal: setName
-
-
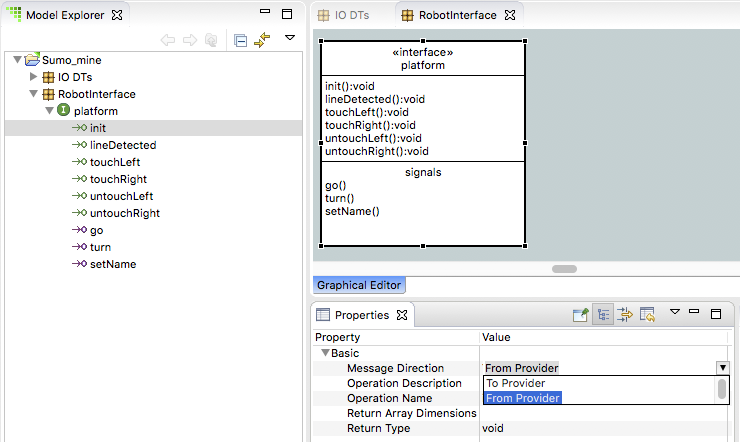
In Model Explorer view, expand Sumo_mine > RobotInterface > platform. All the interface messages are shown.
-
Select init, then use the Properties view to modify the "Message Direction" property to be "From Provider". Repeat this process for each operation (do not change the signals).
-
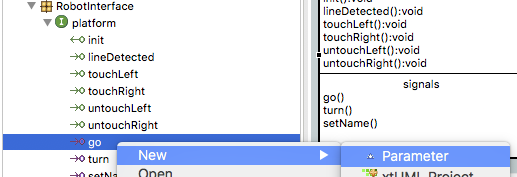
Right-click on go and select New > Parameter. Name the parameter direction.
-
Expand the go interface message. The direction parameter is shown.
-
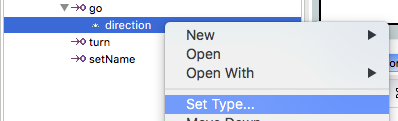
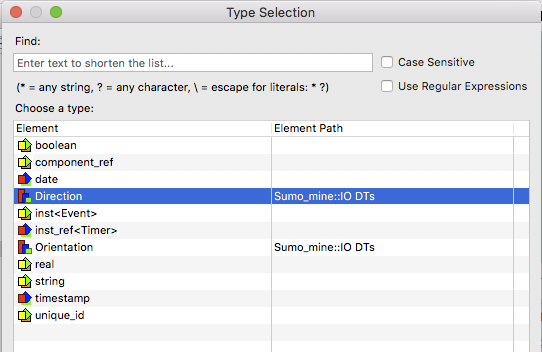
Right-click on the direction parameter and select Set Type…. Use the wizard to select the Direction type.
-
Right-click on turn and select New > Parameter. Name the parameter orientation.
-
Expand the turn interface message. The orientation parameter is shown.
-
Right-click on the orientation parameter and select Set Type…. Use the wizard to select the Orientation type.
-
Right-click on setName and select New > Parameter. Name the parameter name.
-
Expand the setName interface message. The name parameter is shown.
-
Right-click on the name parameter and select Set Type…. Use the wizard to select the string type.
Submitting Your Assignment
-
Take a screenshot of your BridgePoint with Model Explorer view expanded to show all the elements you have created.
-
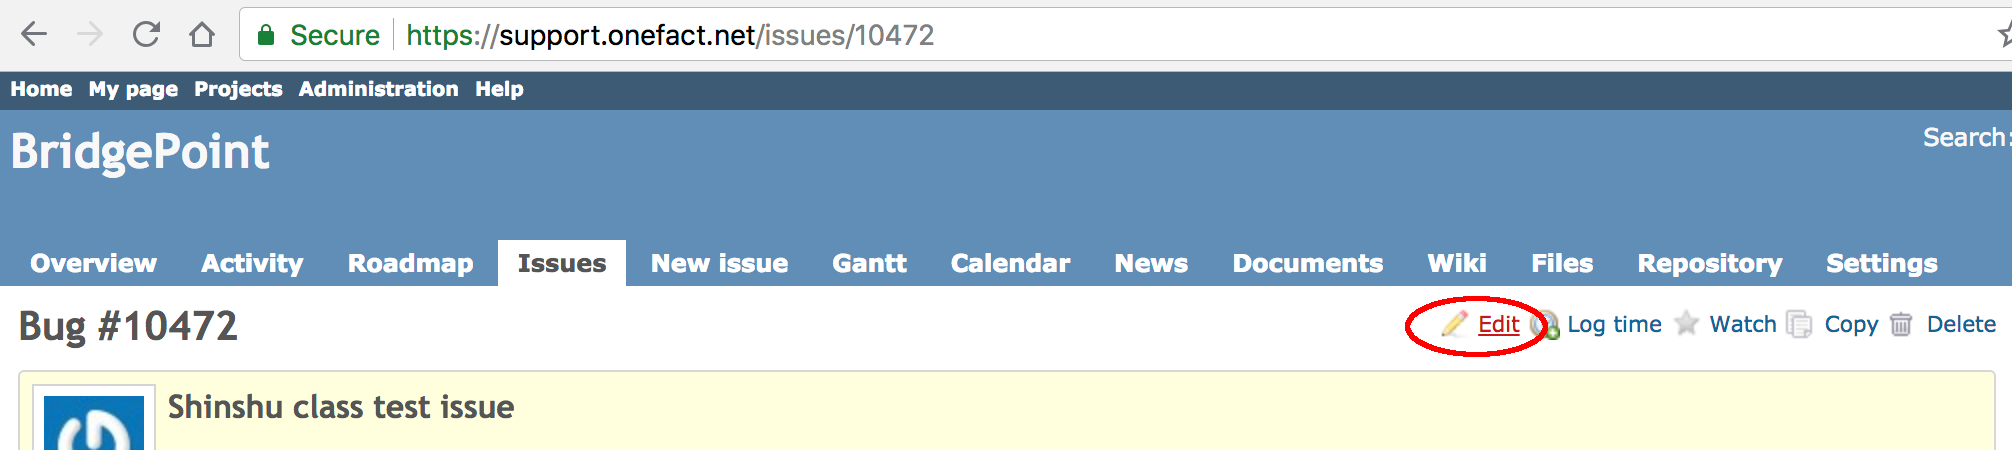
Open the BridgePoint support issue in Redmine that you created in homework 1.1. Issue 10472 is just used here as an example.
-
Edit the issue, scroll down to the Edit field:
-
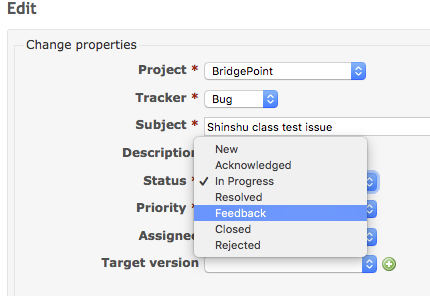
Change the Status to "Feedback"
-
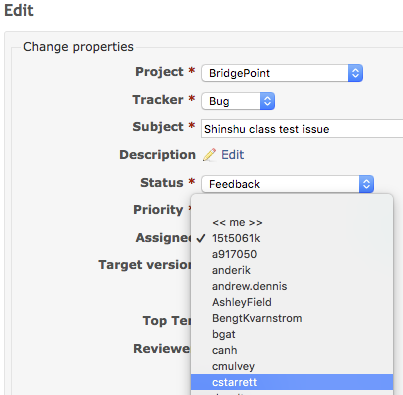
Change the Assignee to "cstarrett"
-
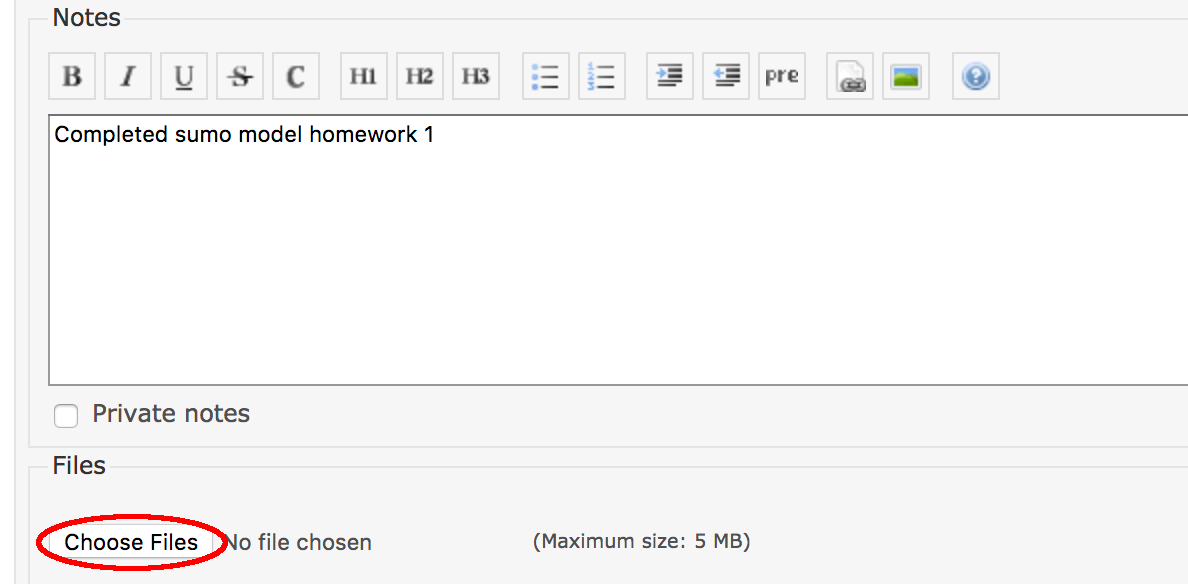
Add a Note that this assignment is completed
-
Use the Choose Files button to attach your screenshot
-
-
Click the
Submitbutton.
You are now ready to proceed to the next step